Thank you!
Your submission has been sent.

Planning a project that involves wiring around a pocket door frame? This task can be a common headache for builders, but with these expert tips from our team, you can tackle it with confidence and ease.
Wiring around pocket door frames can be challenging, but with expert tips from our team, you can streamline the process. Learn the best techniques to ensure a seamless, code-compliant installation without compromising functionality.
When it comes to wiring and installing light switches on pocket door walls, planning is everything. These sleek, space-saving doors come with unique challenges that require a strategic approach to ensure your electrical setup is both functional, maintainable, and code-compliant.
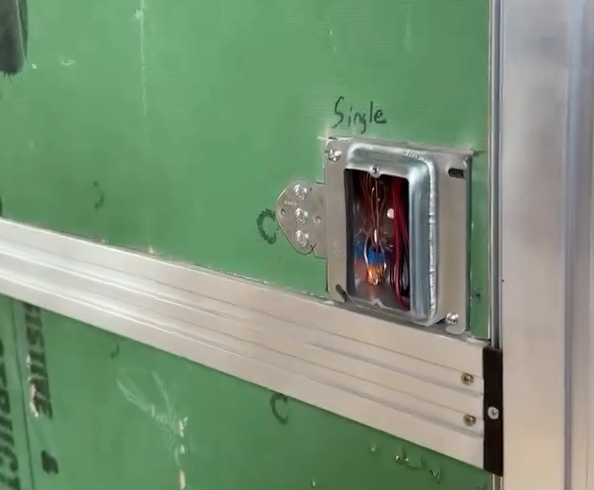
Start by using shallow-depth wall boxes for your switches, which fit snugly into the wall without interfering with the sliding door. For added stability, secure a sheet of plywood to the inner slat channel with screws. This creates reliable mounting points for your electrical boxes, as demonstrated by NS Builders.
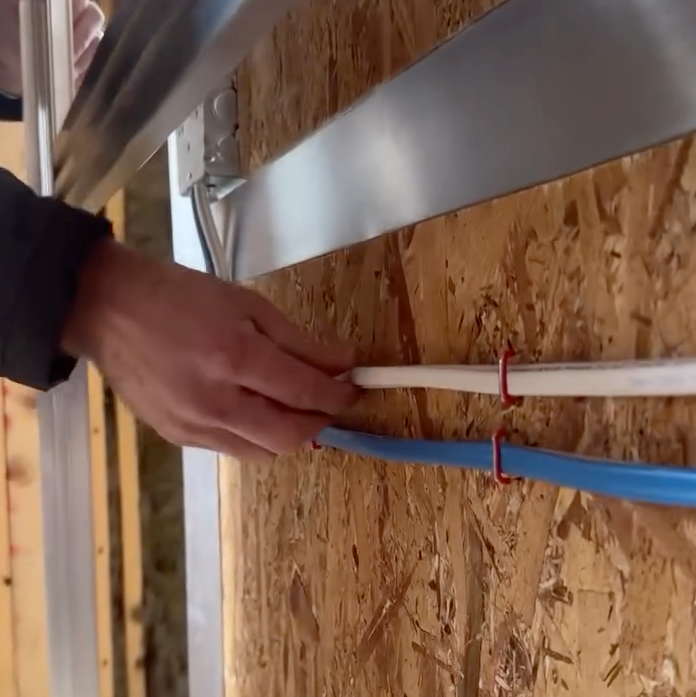
Routing wires in a pocket door wall can be tricky, so here are some solutions. Drill through the slats and install grommets to protect wires and provide additional routing options. Ensure all wiring is stapled securely to prevent interference with the door’s movement.
The type of wire is also important to wire routing. Safety is key, so consider using armored wiring to reduce the risk of accidental penetration when drilling through the door. The material encasing the armored cables reduce the risk of electrical hazards and is highly durable against environmental factors.

Provide more space for the wires and hardware by opting for the CS Ultimate Pocket Frame, as it provides extra cavity room. CS Cavity Sliders recommends opting for the CS Ultimate Pocket Frame which is designed for a 2x6” stud wall. This setup provides extra space within the door pocket, allowing for easier adjustments and hassle-free access for future maintenance.

For a modern touch, centralized smart lighting systems can simplify switch placement and enhance functionality. These systems reduce the need for multiple wall switches, streamlining your design. Additionally, some new smart lighting systems such as Caséta by Lutron allow you to add a switch anywhere without any additional wiring, reducing the need to run wires within the pocket wall.

Finally, always adhere to local electrical codes and consult the product manual for specific guidelines. Paying attention to these details will make light switch wiring a straightforward task and transform your pocket door into a perfect combination of style and functionality.
These tips help future-proof your builds, ensuring smooth, efficient installations and hassle-free maintenance down the line.
Have questions or additional tips to share? We’d love to hear from you!
Electrical and Wiring for Pocket Door Walls: Tips for Success
Thank you!
Your submission has been sent.